If you are looking for appropriate instructions to make essential oils, then you have come to the right place. By making your own essential oils, you will not only be able to increase your savings but will also be able to ensure the purity of the oil. Pure essential oils can then be used in the treatment of various skin disorders such as:
- acne
- chilblains
- couperose
- dry acne
- dry skin
- eczema
- itching
- psoriasis
- puffiness
- rosacea, etc.
Not only are essential oils excellent for addressing skin disorder symptoms, but they can also be utilised in the treatment of various illnesses, such as: bronchitis, headache, migraine, mouth ulcer, gum infection, cold, kidney problems, sinusitis, urinal and vaginal infections, asthma, hypertension, flu, nausea, menstrual pain, insomnia, constipation and many other types of diseases.
The aroma of a pure essential oil that is matched to specific symptoms is an excellent way to allow the therapeutic properties found in nature adddress the condition of various illness.
Essences and oils also are beneficial in relieving the symptoms of various types of mental disorders such as stress, tension, depression, and anxiety, which have become quite common nowadays. In the next few paragraphs, we will answer your most basic question of how to make essential oils at home.
Instructions to Make Your Own Essential Oils
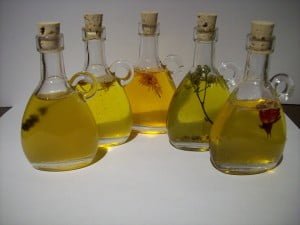
First, you need to gather all the required ingredients such as carrier oil (olive oil or jojoba) and the essential oil herbs. For deriving the full benefits of therapeutic oils, you need to ensure that the mixture of the herbs and the carrier oil is in the right proportion.The thumb rule is quarter ounces of herbs for every cup of carrier oil.
Start by cooking the oil and the herb together at low heat for four to eight hours, preferably in a crock-pot. If you intend to use an oven, then set the temperature at 150 degrees and put the timer on for two hours. Another option is to mix the oil and the herbs together in a mason jar, close the lid, and place the jar in the full sun for at least two weeks. Make sure that the jar you are using has a rubber ring and not a metallic ring as metal can easily contaminate the mixture.
The mixture obtained from all the three processes stated above is then strained by using cheesecloth or other similar technique. The mixture derived from the straining process is your own home made essential oil, ready for use.
Things to Do and Things to Avoid
It is important to label the jars with the exact date when you created your essential oil blend because the normal shelf life of homemade essential oils is six months. After this time the product starts decomposing. It is also necessary to store the jars in a cool, dark, and dry spot for preserving the medicinal and aromatic properties of your homemade essential oils.
Do not try to heat the oil in a microwave, as it will rob the oil of its medicinal and aromatic properties. Do not ingest these oils even in small quantities because they are strictly meant for topical use only.
Homemade essential oils do help in relieving the symptoms of various types of mental and bodily disorders but the efficacy of any homemade essential oil will depend on the quality of herbs used. So use organic herbs when you can, and also a very high quality carrier oil. Instructions to make essential oils are easily available, what is difficult is getting the right quality herbs.